
I’m excited to share a cost-effective way to update your kitchen. You can learn how to wrap a kitchen cupboard yourself. This method is cheaper than hiring a professional, who can charge £2,000 – £4,0001 for the job. A single door vinyl wrap can cost between £180 – £2501.
By wrapping your kitchen cupboard, you can save money and still get a professional look. It’s a great option for those looking to update their kitchen without spending a lot.

Key Takeaways
- Learning how to wrap a kitchen cupboard can be a fun and rewarding DIY project.
- DIY enthusiasts can achieve a kitchen update for as low as £70 using vinyl wrap1.
- Vinyl wrap is significantly cheaper than replacing kitchen cabinetry, with savings typically ranging between 50% to 75%2.
- High-quality vinyl wraps can last 5 to 10 years, depending on usage and maintenance2.
- With the right tools and techniques, you can achieve a professional-looking finish and transform your kitchen without breaking the bank.
- Wrapping a kitchen cupboard is a cost-effective way to give your kitchen a fresh, modern look, and by following some essential kitchen cupboard wrapping tips, you can ensure a successful application.
- Vinyl wraps can be a fraction of the price compared to materials like marble, granite, or wood1.
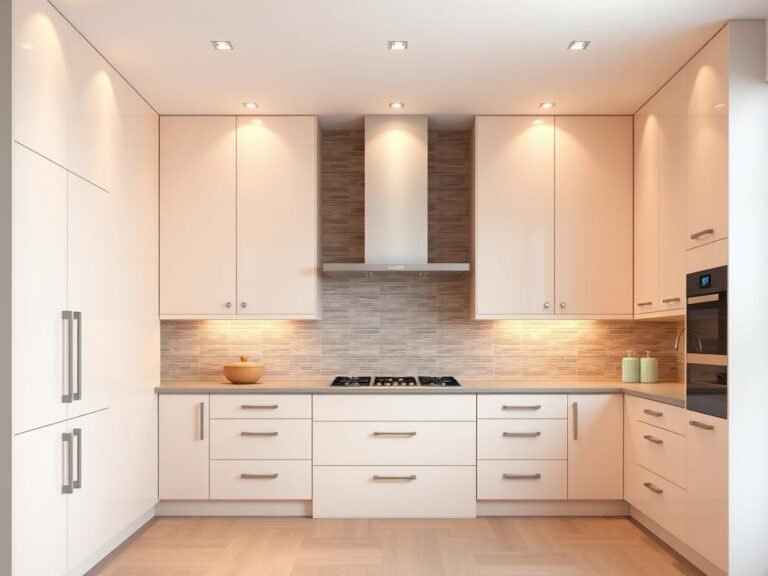
Understanding Kitchen Cupboard Wrapping Basics
When thinking about kitchen renovation ideas, consider your kitchen cupboards. Updating them can give your kitchen a fresh look. A cupboard wrapping tutorial is a great way to do this by applying vinyl wrap to your cupboards3.
This method can cover just the cabinet doors or the whole kitchen3. The cost varies, from AED 700 for a single door to AED 5,000 for the whole kitchen3. It’s cheaper and less messy than a full renovation3.
Materials for wrapping include glossy to matte finishes, making your kitchen look better3.
Wrapping your kitchen cupboards protects them from damage and is easy on the wallet3. But, there are downsides. Flow wraps can peel, bubble, or get damaged in hot or wet places4. They need regular care to last, and you’ll need to replace them when they start peeling4.
Despite these issues, many people choose kitchen wrapping to update their kitchen without spending a lot. With the right tools and skills, you can get a professional look. Whether you need a quick fix or a lasting change, a wrapping tutorial can help you start3.
Essential Tools and Materials for Your Project
To wrap your kitchen cabinets, you need the right tools and materials. Follow kitchen cabinet wrapping instructions and diy cupboard wrapping tips to get ready. You’ll need a measuring tape, scissors, and a squeegee for a smooth job5.
Vinyl wrap is a key material. It comes in many types and designs. Pick one that’s durable and easy to clean. For a pro look, choose high-quality vinyl and follow the maker’s guide6.
Here’s what you’ll need:
- Measuring tape
- Scissors
- Squeegee
- Vinyl wrap
- Primer (optional)
Choose vinyl wrap that matches your kitchen’s style. With the right tools and materials, you’ll get a beautiful, lasting cabinet wrap5.
Follow these diy cupboard wrapping tips and use the right tools and materials. You’ll make a stunning cabinet wrap that will last for years. Always follow the maker’s instructions and be careful for a successful job6.
| Tool/Material | Description |
|---|---|
| Measuring tape | Used to measure the cabinet surface |
| Vinyl wrap | Available in various designs and patterns |
| Squeegee | Used to apply the vinyl wrap smoothly |
Preparing Your Kitchen Space for Wrapping
To start a kitchen cupboard wrapping project, you need to get your kitchen ready. This means clearing and cleaning the area, taking off hardware and doors, and getting the surfaces ready for wrapping. A guide will help you do this step by step. Vinyl wrapping kitchen cabinets is a budget-friendly DIY option compared to traditional refacing7.
It’s cheaper because you don’t need to spend as much on supplies as you would for a full installation8.
A good tutorial will stress the need for surface prep. This includes making sure the surfaces are clean for a smooth wrap. Vinyl wraps can also save money compared to full kitchen makeovers8.
Wrapping your kitchen cupboards is much cheaper than replacing them or getting them professionally painted. You can save over 50% by using vinyl wrap instead of replacing the cabinets9.
Here are some tips for preparing your kitchen:
- Clear the area around the cupboards to prevent any obstacles or damage.
- Remove hardware and doors to ensure a smooth wrapping process.
- Clean the surfaces thoroughly to ensure a strong bond between the vinyl and the cupboard.
By following these steps and using a guide, you can wrap your kitchen cupboards successfully. Make sure to pick the right vinyl wrap, like adhesive-backed or peel-and-stick, and follow the manufacturer’s application instructions7.
How to Wrap a Kitchen Cupboard: The Complete Process
Updating your kitchen can be easy and affordable. Vinyl wrapping for kitchen cupboards is a great choice because it’s durable and looks good10. The cost to wrap your kitchen cabinets can be between £150 and £600, depending on the size10.
Vinyl wrapping is also cost-effective, with prices between $5 and $15 per square foot2. This is a good option for those who want to refresh their kitchen without spending a lot. Plus, vinyl wraps can look like wood, marble, or metal, with over 200 colors and patterns to choose from9.
Here are some tips for wrapping your kitchen cupboards:
- Cleaning the surface before wrapping can cut down air bubble problems by up to 80%9.
- Using a heat gun or hairdryer can make the vinyl more pliable by up to 50%. This helps with edges and corners9.
- Keeping the wrapped surfaces clean every 3-4 months can make the wrap last about 30% longer9.
By following these tips and using quality vinyl wraps, you can get a professional look. Enjoy the benefits of easy ways to wrap kitchen cabinets and vinyl wrapping for kitchen cupboards1029.

Measuring and Cutting Your Wrapping Material
To get a professional look when wrapping kitchen cupboards, you need the right materials and techniques. Measuring and cutting the material right is key. Cutting wrong can waste up to 15% of the material11. This saves money and is better for the environment.
Using templates is also important. They help you cut the material to fit your cupboards perfectly. For clean cuts, use a sharp knife or a cutting mat11. Also, using a heat gun or hairdryer can make the material more pliable, making it easier to apply11.
Vinyl wraps are great for kitchen cupboards because they last long and don’t get damaged easily12. They’re also good for the planet because they don’t need old cabinets to be removed12. With these materials and the right techniques, your kitchen will look amazing.
Vinyl wraps are also a smart choice because they can save you up to 50% on renovation costs11. They can also make your kitchen look new in just a few days12. By choosing the right materials and techniques, you can make your kitchen look professional.
| Material | Thickness | Benefits |
|---|---|---|
| Vinyl Wrap | 0.015-0.030 inches | Cost-effective, durable, eco-friendly |
| Laminate | 0.015-0.030 inches | Resistant to scratches, fading, and chipping |
Professional Tips for Smooth Application
For a diy kitchen cupboard wrapping job, a smooth finish is key. Use a squeegee to get rid of air bubbles and apply heat for better adhesion13. Also, avoiding air bubbles is crucial to keep the wrap looking good13.
Choosing the right vinyl wrap is also important for a successful kitchen renovation ideas project. You can pick from wood grain, metal, or glossy finishes for any hard surface14. Premium wraps have grid lines for accurate cutting, reducing mistakes13.
Vinyl wraps are cost-effective, with prices from $300 to $800 for a whole kitchen15. They’re also flexible, making it easy to change designs without big commitments14. For a smooth application, clean the surface gently to keep the wrap’s finish13.
- Use a squeegee to remove air bubbles
- Apply heat to ensure the wrap adheres properly
- Avoid air bubbles to maintain a professional-looking finish
By following these tips and exploring your options, homeowners can do a great diy kitchen cupboard wrapping job. They can also improve their kitchen renovation ideas with a stunning, lasting finish.
| Vinyl Wrap Type | Cost | Benefits |
|---|---|---|
| Wood Grain | $300-$500 | Realistic wood grain pattern, easy to install |
| High Glossy Sheen | $500-$800 | Modern and sophisticated look, easy to clean |
Handling Corners and Edges Like a Pro
When it comes to kitchen decor tips, handling corners and edges is key. It can be tough, but with the right methods, you can get a pro finish16. First, clean and clear the area around corners and edges.
Mastering corner folding is a big part of the tutorial. It makes your cupboards look sleek and modern17. Use tools like a credit card or a folding tool to get sharp folds. Also, a top-notch vinyl wrap can greatly improve your cupboards’ look9.
Edge treatment is also vital. Use a special adhesive or sealant to keep the vinyl wrap in place16. By following these steps, your kitchen will look better, and your cupboards will seem new.
Popular edge treatments include silicone sealant or edge trim17. They help make the finish smooth and prevent peeling. Adding these techniques to your tutorial will give you a lasting, high-quality finish9.
Troubleshooting Common Wrapping Issues
Easy kitchen upgrades can be a big help, thanks to kitchen cabinet wrapping instructions. But, even with the best methods, problems can still happen. Knowing how to fix common issues is key for a successful wrap18.
Issues like air bubbles, alignment problems, and wrinkles can pop up. To fix air bubbles, a small hole can help air escape, making the wrap better18. For alignment, double-check your measurements to avoid mistakes and save material18. Heat can also smooth out wrinkles and creases, making the vinyl fit better18.
Also, making sure the surface is ready is important to prevent peeling or lifting19. Vinyl wrapping costs can vary from £8 to £30 for a 2-meter roll, based on quality and design17. With these tips, homeowners can get a pro-looking wrap that’s cheaper than replacing cabinets or redoing the whole kitchen17.
Understanding and solving common wrapping problems can make kitchen upgrades easy and rewarding. Homeowners can enjoy beautiful, lasting kitchen cabinet wraps18.
Maintaining Your Wrapped Cupboards
To keep your wrapped cupboards looking great, regular cleaning is key. Use gentle cleaners to protect the vinyl finish20. Also, try to avoid too much moisture to prevent damage to the adhesive20.
Be careful with sharp objects to avoid scratches20. Use vinyl-friendly polish to make your cabinets look better for longer21. Remember, sunlight can cause colors to fade over time20.
For kitchen cupboard wrapping tips, clean your cupboards weekly20. Adding cabinet handles can also help20. These steps will help your cupboards stay in top shape for years.
Regular care, like cleaning and fixing issues quickly, can make your cabinets last longer21. By following these kitchen cupboard wrapping tips and diy cupboard wrapping tips, your cupboards will stay beautiful for years.
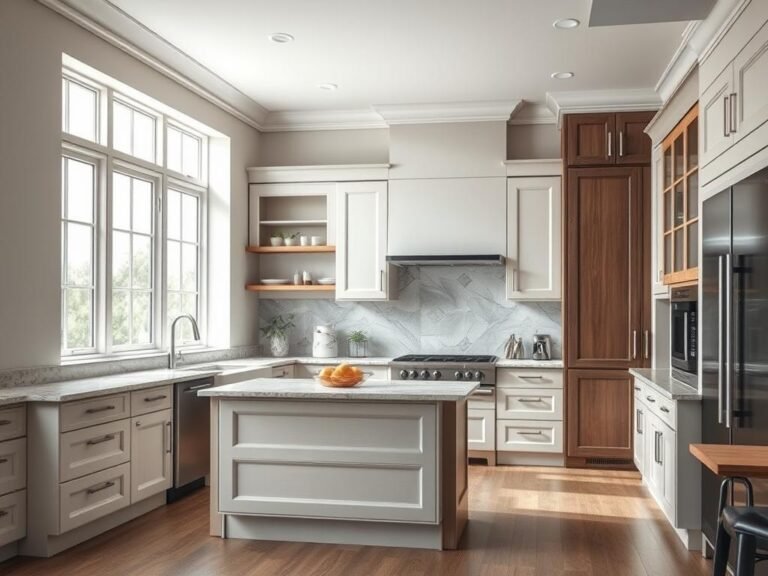
Conclusion: Transforming Your Kitchen with Wrapped Cupboards
Wrapping your kitchen cupboards is a smart and cost-effective way to22 give your kitchen a fresh, modern look. You can choose from a wide variety of23 colors, textures, and finishes. This makes it easy to find the perfect vinyl wrap for your design preferences and24 transform your space on a budget.
The process of wrapping kitchen cupboards is not only22 straightforward and efficient but also23 durable. The vinyl film provides long-lasting protection against23 wear, tear, and fading. Plus, the removable nature of the wrap allows for22 future updates and changes, making it a flexible solution for your23 kitchen renovation needs.
Whether you choose to tackle the project as a24 DIY endeavor or opt for professional installation, wrapping your kitchen cupboards is a24 time-saving and environmentally-friendly alternative to traditional remodeling. It can24 save up to 70% on renovation costs and reduce waste by reusing existing cabinets. It’s a smart choice that can24 transform your kitchen without breaking the bank.
So, what are you waiting for? Get ready to23 revitalize your kitchen with the power of wrapped cupboards and24 create the space of your dreams. Start your22 kitchen transformation journey today!
FAQ
What is cabinet wrapping?
Cabinet wrapping is when you put a decorative vinyl or adhesive film on your kitchen cabinets. It gives them a new look without needing to replace them.
What are the benefits of wrapping vs. painting?
Wrapping is cheaper than painting and lets you change colors or finishes easily. It also protects the cabinets and is easier to keep up than paint.
What tools and materials do I need for cabinet wrapping?
You’ll need a vinyl wrap, a measuring tape, a utility knife, a squeegee, a heat gun, and a clean workspace.
How do I prepare my kitchen space for cabinet wrapping?
First, clear the area and take off the cabinet doors and hardware. Then, clean the surfaces well for a smooth wrap.
What are the steps for wrapping a kitchen cabinet?
The steps are: 1) Measure and cut the vinyl wrap, 2) Apply it to the cabinet surfaces, and 3) Wrap the edges and corners neatly.
How do I handle corners and edges when wrapping?
To get a smooth finish, learn how to fold corners and treat edges. It takes practice, but the right tools and techniques help.
What are some common wrapping issues and how do I troubleshoot them?
Issues like air bubbles and wrinkles can happen. Use a heat gun, re-align the wrap, and smooth out problems to fix them.
How do I maintain my wrapped cabinets?
Keep them clean with a mild cleaner, avoid scratches, and fix any damage to the vinyl wrap quickly.