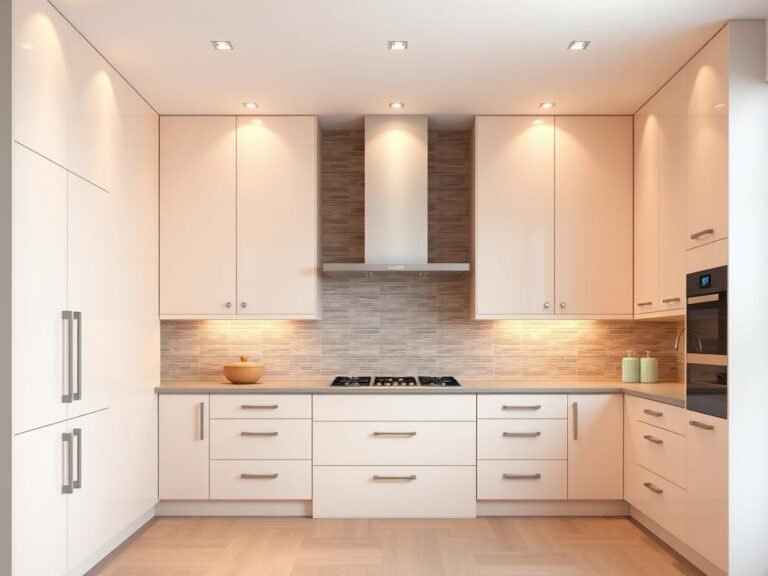

Ever wondered why some kitchen cabinets look sleek and professional while others seem dull and worn out? The secret lies in choosing the best paint and applying it with the right techniques. Your kitchen cabinets deserve a durable finish that not only enhances their appearance but also withstands daily wear and tear.
This guide will walk you through everything you need to know, from selecting high-quality products like Sherwin-Williams Urethane Trim Enamel to mastering the prep work and application process. Whether you’re a DIY enthusiast or just looking for expert advice, achieving a factory-smooth finish is within your reach1.
With trusted brands like Sherwin-Williams and Benjamin Moore, you can transform your kitchen cabinets into a stunning focal point. Let’s dive into the details and help you create a space that’s both beautiful and functional.
Key Takeaways
- Choosing the right paint ensures a professional, long-lasting finish.
- High-quality products like Sherwin-Williams Urethane Trim Enamel are ideal for durability.
- Proper prep work is essential for a smooth, factory-like result.
- Semi-gloss finishes are popular for their durability and washability2.
- DIY efforts can achieve professional results with the right tools and techniques.
Introduction: Transform Your Kitchen with the Right Paint
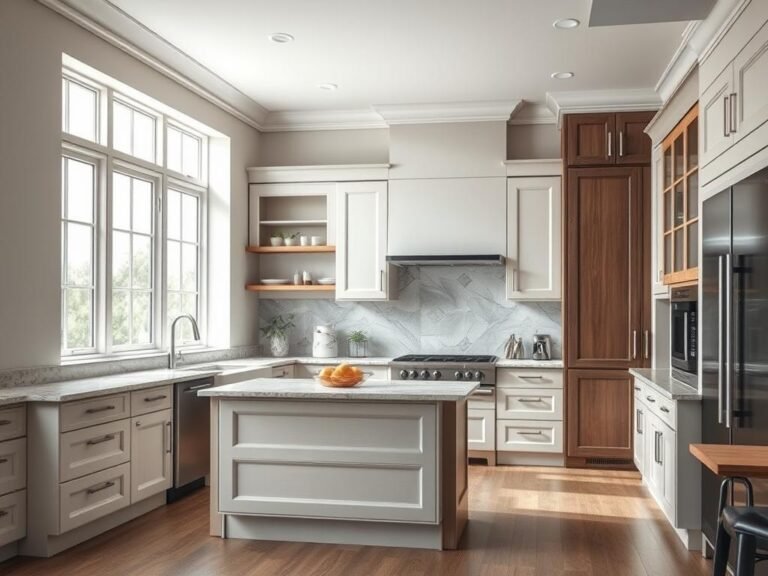
Transforming your kitchen doesn’t have to involve a full remodel—just the right paint can make all the difference. A fresh coat can turn dull, outdated cabinets into a stunning focal point, giving your space a modern, professional look3.
Not all paints are created equal. Cabinet paint is specifically formulated for high-use areas, offering durability and a smooth finish that wall paint simply can’t match. It’s designed to withstand daily wear and tear, making it the ideal choice for your kitchen cabinets4.
Choosing the right finish is equally important. Semi-gloss options are popular for their durability and easy-to-clean surface. They also add a subtle shine that enhances the overall look of your cabinets3.
Preparation is key to achieving a flawless result. Start by cleaning and lightly sanding the wood to ensure proper adhesion. A high-quality primer is essential, especially for heavily stained surfaces, as it creates a strong base for the paint4.
This guide will walk you through each step, from selecting the right products to applying the final coat. With the right tools and techniques, you can achieve a professional finish that lasts for years to come.
What Type of Paint for Kitchen Cabinets – Key Considerations
The finish of your cabinets depends heavily on the product you choose. Understanding the differences between oil-based, latex, enamel, and hybrid urethane formulations can help you achieve a durable and professional look. Each option has unique benefits and limitations, making it essential to weigh your priorities.
Oil-based products are known for their durability and resistance to scratches and dents. However, they emit volatile organic compounds (VOCs), which can pose health risks and have a longer drying time5. For households with children or pets, this may not be the best choice.
Latex options are more budget-friendly and eco-friendly, with low- or no-VOC formulas available. They dry faster but may not be as durable in high-traffic areas like the kitchen6. If you prioritize ease of cleanup and environmental safety, this could be your go-to.
Enamel and hybrid urethane formulations are increasingly popular for their durability and smooth finish. Water-based alkyd paints, for example, level better than acrylics and dry harder, achieving a vibrant color7. These are ideal for achieving a factory-like finish without the hazards of oil-based products.
When choosing a product, consider exposure to heat, moisture, and cleaning frequency. Gloss and semi-gloss finishes are recommended for exteriors due to their ease of cleaning, while eggshell or satin finishes work well for interiors5.
| Product Type | Benefits | Drawbacks |
|---|---|---|
| Oil-Based | Durable, scratch-resistant | High VOCs, long drying time |
| Latex | Fast-drying, eco-friendly | Less durable in high-traffic areas |
| Enamel/Hybrid Urethane | Smooth finish, durable | Higher cost |
By understanding these options, you can make an informed decision that balances durability, aesthetics, and environmental impact. Whether you choose oil-based, latex, or enamel, the right product will transform your cabinets into a stunning focal point.
Understanding Your Cabinet Materials and Preparation
Achieving a flawless finish on your cabinets starts with understanding their material and proper preparation. Whether your cabinets are made of solid wood, MDF, or laminate, each material requires specific prep steps to ensure the paint adheres well and lasts longer8.
Assessing Cabinet Materials
Start by identifying the material of your cabinets. Solid wood is durable and sands easily, while MDF and laminate need extra care. For laminate, a bonding primer is essential to ensure the paint sticks properly8.
Check the condition of your cabinets. Look for scratches, dents, or peeling paint. Addressing these issues before painting ensures a smooth, professional result. Proper prep work saves time and effort in the long run.

Surface Cleaning and Degreasing Methods
Clean your cabinets thoroughly before painting. Grease and dirt can prevent the paint from adhering properly. Use a degreaser or a mixture of warm water and mild detergent to remove buildup8.
After cleaning, sand the surface lightly to create a rough texture for better primer adhesion. Use fine-grit sandpaper for a smooth finish. Wipe away dust with a tack cloth to ensure a clean surface9.
Apply a high-quality primer to seal the surface and provide a strong base for the paint. Let the primer dry for at least 24 hours before sanding again for a flawless finish9.
| Step | Tool/Material | Purpose |
|---|---|---|
| Cleaning | Degreaser or mild detergent | Remove grease and dirt |
| Sanding | Fine-grit sandpaper | Create texture for adhesion |
| Priming | High-quality primer | Seal and prepare the surface |
Taking the time to prepare your cabinets properly ensures a durable, professional-looking finish. With the right tools and techniques, your DIY project will yield stunning results.
Comparing Paint Options for a Durable Cabinet Finish
Selecting the right product for your cabinets can make or break the final look. With so many choices available, understanding the differences between oil-based, water-based, and hybrid options is essential. Each has unique benefits, and your decision will impact the durability, appearance, and ease of maintenance of your cabinets.

Oil-Based Paint vs. Water-Based Alternatives
Oil-based products are known for their durability and resistance to scratches and dents. They create a hard, resilient surface that’s ideal for high-traffic areas like the kitchen. However, they emit strong odors and contain higher levels of VOCs, which can be harmful to your health10.
Water-based alternatives, like latex paint, are eco-friendly and dry faster. They’re easier to clean up and emit fewer harmful chemicals. While they may not be as durable as oil-based options, modern formulas like Sherwin-Williams Emerald Urethane Trim Enamel offer a balance of durability and low VOC levels11.
Exploring Alkyd and Hybrid Enamel Choices
Alkyd and hybrid enamel products combine the best of both worlds. They provide the durability of oil-based paints with the ease of application and low VOC levels of water-based options. For example, Benjamin Moore Advance offers a smooth finish and dries to touch in just 4-6 hours11.
These products are ideal for achieving a professional, long-lasting finish. They’re resistant to moisture and wear, making them perfect for kitchen cabinets. Brands like Sherwin-Williams and Benjamin Moore offer a wide range of colors and finishes to suit your style12.
| Product Type | Pros | Cons |
|---|---|---|
| Oil-Based | Durable, scratch-resistant | High VOCs, strong odor |
| Latex Paint | Fast-drying, eco-friendly | Less durable in high-traffic areas |
| Alkyd/Hybrid Enamel | Smooth finish, low VOCs | Higher cost |
By comparing these options, you can choose the best paint for your needs. Whether you prioritize durability, ease of application, or environmental safety, there’s a product that will give your cabinets a stunning, long-lasting finish.
Step-by-Step Approach to Achieving a Professional Finish
Achieving a professional finish on your cabinets is easier than you think with the right approach. By following a detailed, step-by-step process, you can transform your space into a stunning focal point. Let’s break it down into manageable steps to ensure your project is a success.
Planning, Repairs, and Sanding Between Coats
Start by planning your project carefully. Assess the condition of your cabinets and make any necessary repairs. Fill in scratches or dents with wood filler and let it dry completely13. Proper planning ensures a flawless look and saves time later.
Next, sand the surface lightly to create a rough texture for better adhesion. Use 120-grit sandpaper for smooth surfaces and 220-grit for glossy finishes14. Sanding between coats is critical to achieving a professional smooth finish. Wipe away dust with a tack cloth to ensure a clean surface.

Apply a high-quality primer to seal the surface and provide a strong base for the paint. Let the primer cure for at least 24 hours before sanding again for a flawless result14. This step ensures the paint adheres well and lasts longer.
Layering Primer and Paint for a Smooth Look
Once the primer is ready, it’s time to apply the first coat of paint. Use a high-quality brush or roller for even application. Allow the first coat to dry completely before sanding lightly and applying the second coat15. This layering technique ensures a durable and professional finish.
Pay attention to the dry time between coats. Rushing this step can lead to uneven results. For best results, allow each coat to dry for at least 2-4 hours before applying the next14. Patience is key to achieving a factory-like finish.
Finally, let the paint cure for 7-10 days before heavy use. This ensures the finish is fully hardened and resistant to wear and tear14. With these steps, your DIY project will yield stunning, long-lasting results.
| Step | Tool/Material | Purpose |
|---|---|---|
| Planning & Repairs | Wood filler, sandpaper | Prepare the surface for painting |
| Priming | High-quality primer | Seal and prepare the surface |
| Painting | Paint, brush/roller | Apply even coats for a smooth finish |
Tools and Techniques for a Smooth Application
Getting that perfect, smooth finish on your cabinets starts with the right tools and techniques. Whether you’re a DIY enthusiast or a seasoned pro, choosing the best application method can make all the difference. From rollers to brushes and sprayers, each tool has its strengths and ideal use cases.

Roller, Sprayer, or Brush – Choosing the Best Tool
When it comes to painting cabinets, the tool you use can significantly impact the final result. Rollers are excellent for covering large, flat surfaces quickly. They provide a fairly even finish, making them ideal for cabinet fronts and backs16. However, if not applied carefully, they can leave a slight texture on the surface.
Brushes are perfect for detailed work, especially in corners and crevices. High-quality brushes can prevent uneven application and brush marks, ensuring a professional look16. However, relying solely on brushes can be time-consuming and may result in visible drip marks.
For an even smoother finish, consider using a sprayer. Sprayers can deliver a factory-like finish without drips or streaks. However, they require extensive preparation to protect surrounding areas from overspray16. Proper hardware, like a respirator mask and safety glasses, is essential when using a sprayer to avoid inhaling fumes17.
Here’s a quick comparison to help you decide:
| Tool | Best For | Considerations |
|---|---|---|
| Roller | Large, flat surfaces | May leave texture if not applied carefully |
| Brush | Detailed work, corners | Time-consuming, potential for drip marks |
| Sprayer | Even, smooth finish | Requires extensive preparation |
Proper maintenance of your tools is also crucial. Clean your brushes, rollers, and sprayers thoroughly after each use to ensure their longevity. Investing in quality hardware will save you time and effort in the long run.
By choosing the right tool for the job and following these tips, you can achieve a professional, factory-smooth finish that transforms your cabinets into a stunning focal point.
Essential Primers and Surface Treatments for Cabinets
The foundation of a flawless cabinet finish lies in the right primer and surface treatment. Proper preparation ensures your cabinets not only look great but also stand up to daily wear and tear. Choosing the correct primer and understanding dry time are critical steps in achieving a durable and professional result.

Selecting the Right Bonding Primer
A bonding primer is essential for ensuring paint adheres properly, especially on challenging surfaces like laminate or previously painted doors. For example, Kilz primer is highly recommended for IKEA laminate due to its ability to create a textured surface for better adhesion18. Oil-based primers, like Zinsser Cover Stain, are ideal for wood cabinets as they block tannins and provide superior adhesion19.
When selecting a primer, consider the material of your cabinets. Raw wood and MDF may require different products. A single coat is usually sufficient, but highly absorbent materials like MDF might need a second application19.
Drying Times and Curing Considerations
Understanding dry time and curing is crucial for a long-lasting finish. For instance, Benjamin Moore Advance paint requires at least 16 hours between coats and can take weeks to fully cure19. Rushing this process can lead to peeling or uneven results.
Allow the primer to cure completely before applying the first coat of paint. This ensures a strong bond and prevents future issues. Proper curing also enhances durability, making your cabinets resistant to scratches and stains18.
“The right primer and curing process are the unsung heroes of a professional cabinet finish.”
By investing time in surface preparation and choosing the right products, you can achieve a stunning, durable result that transforms your space.
Maintaining Your Painted Cabinets: Tips and Tricks
Keeping your cabinets looking fresh and vibrant requires consistent care and attention. With the right techniques, you can preserve their professional finish and ensure they stay as good as new for years to come. Let’s explore practical ways to maintain your cabinet door surfaces and address minor wear and tear.
Cleaning Methods and Touch-Up Advice
Routine cleaning is essential to maintain the look of your cabinets. Use a gentle, grease-cutting solution to remove buildup without damaging the finish. Avoid harsh chemicals or abrasive cleaners, as they can strip the paint and compromise the result20.
For minor damages like scuffs or scratches, quick touch-ups can restore the color and appearance. Use a small brush to apply matching paint, blending it seamlessly with the original finish. This approach ensures a consistent look without the need for a full repaint21.
Here’s a quick guide to maintaining your cabinets:
| Task | Tool/Material | Purpose |
|---|---|---|
| Cleaning | Mild detergent, soft cloth | Remove grease and dirt |
| Touch-Ups | Matching paint, small brush | Repair minor damages |
| Inspection | None | Identify wear early |
Regular inspections help you catch issues before they worsen. Look for signs of wear, such as peeling or fading, and address them promptly. This proactive approach saves time and effort in the long run20.
By following these tips, you can keep your cabinet door surfaces looking their best. A little effort now ensures a stunning, long-lasting finish that enhances your space.
Conclusion
Your kitchen transformation starts with the right materials and techniques. Choosing a high-quality product like Sherwin-Williams Urethane Trim Enamel ensures a durable and professional finish. This water-based option dries quickly, offering both efficiency and long-lasting results22.
Proper preparation is key. Clean and sand your surfaces thoroughly, and apply a bonding primer for better adhesion. Whether you prefer a satin or semi-gloss finish, the right sheen enhances both the look and durability of your cabinets23.
Trust the process and invest in premium materials. With patience and attention to detail, you can achieve a stunning, long-lasting outcome. Revisit the steps outlined here as you begin your project, and enjoy the transformation of your space.