Did you know that about 80% of kitchen remodels include new cabinets? This shows how key it is to know how to put in kitchen cabinets. It’s a great DIY project for homeowners. We can save $1,000 to $3,000 by doing it ourselves instead of hiring pros1.
We can also make our kitchen our own. In this guide, we’ll walk you through installing kitchen cabinets step by step. We’ll cover everything from getting ready to the final touches. This way, our new cabinets will be both useful and look great.

Key Takeaways
- Knowing the right tools and materials is key for cabinet installation.
- Checking new cabinets for everything you need helps avoid problems.
- Measuring right ensures cabinets fit perfectly.
- Having a good plan makes installation smoother.
- Correctly aligning and securing cabinets makes them last longer.
- Finishing touches can really make cabinets work better and look nicer.
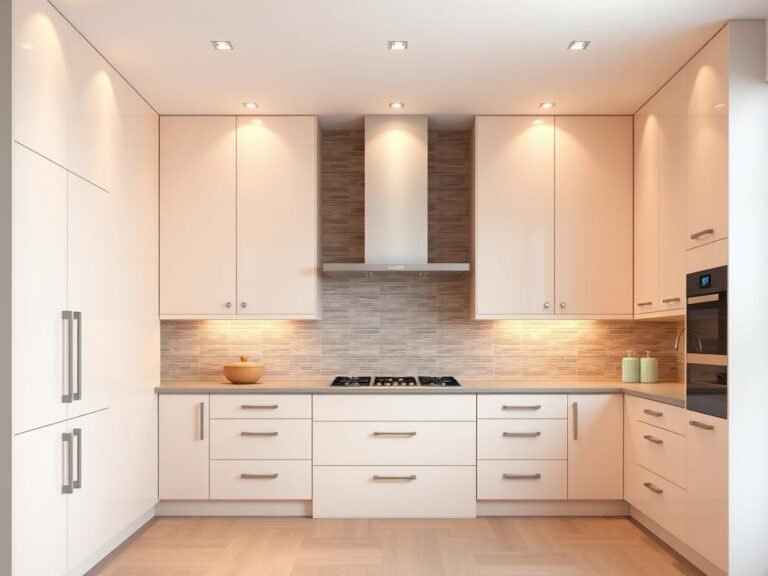
Introduction to Kitchen Cabinet Installation
Installing kitchen cabinets is a fun project for many homeowners. It involves planning, measuring, and installing. Choosing the right cabinets is also key. Most people prefer whole kitchen cabinets for their look and value2.
Doing it yourself can save money and make your home feel more personal. It’s a rewarding experience.
For a successful project, we need to follow important tips. Measuring correctly is vital to avoid gaps3. Without checking sizes first, families might face problems3. With good planning, we can get a professional look.
It’s also important to consider the timing for countertops. The size of cabinets can cause delays2. The bonding time for adhesives changes with the weather, taking longer in winter2. Knowing these details helps us have a better DIY experience.
Preparing for Your Kitchen Cabinet Installation
Preparation is key for a smooth kitchen cabinet installation. Start by clearing the area. This makes the space organized and easier to work in. If old cabinets are coming out, fix any wall damage first.
Fixing walls and painting them fresh looks better and helps avoid problems. A clean space lets us follow our checklist better. This ensures everything is ready before we start.
Think about new flooring and how it fits with cabinet installation. For a floating floor, put cabinets in first for a neat look. Remember, upper cabinets should be 54 inches from the floor4. Also, keep 18 inches between base cabinets and countertops5.
Before starting, gather all the tools you’ll need. You’ll need a drill, tape measure, and level, among others4.
Following the right steps is important. Make sure cabinets are level and plumb before securing them. Shims can help with uneven floors, common in older homes5. These steps help avoid problems and make the installation go smoothly.
| Task | Details |
|---|---|
| Clear Workspace | Remove obstacles to create a clean area for installation. |
| Repair Walls | Patch holes and repaint as necessary to prepare surfaces. |
| Install New Flooring | If using floating floors, install before wall cabinets. |
| Gather Tools | Ensure all 10 essential tools for installation are on hand. |
| Follow Measurements | Keep standard heights and distances in mind (e.g., 54 inches for upper cabinets, 18 inches to countertops). |
By preparing well and following these steps, we can have a successful kitchen remodel456.
Gathering the Essential Tools and Materials
Before we start installing cabinets ourselves, we need to gather all the tools and materials. This step will save us time and make the installation smooth. The right tools and techniques are key to a professional look.
List of Necessary Tools for Cabinet Installation
- Drill/driver: Needed for drilling holes and driving screws7.
- Level: A 4-foot level is best for hanging cabinets straight7.
- Screwdriver: Important for tightening screws during installation.
- Stud finder: Helps find wall studs for cabinet support7.
- Tape measure: Used for measuring the area and cabinet placement7.
- Cabinet jack or support system: Helps lift and place cabinets safely7.
- Combination countersink drill bit: Creates flush screw holes.
- Jack posts: Offer extra support during installation.
- Bar clamps and a pocket hole jig: Needed for corner cabinets8.
- Safety equipment: Goggles, hearing protection, and dust masks are vital for safety8.
- Power tools like a table saw or circular saw make cuts easier8.
Materials You Will Need
- 3/4-inch plywood: Great for cabinet walls and shelves8.
- 1-by-2, 1-by-3, and 1-by-6 boards: Needed for the face frame8.
- 1 1/4-inch 18-gauge finish nails and coarse thread pocket hole screws: Essential for assembly.
- Crown molding and wood glue: Used for finishing touches.
- Wood filler: Covers any imperfections after installation.
- Additional screws are needed at the bottom of cabinets for stability7.
- Installation of glass doors may require screw-on plastic clips for securing panels7.
- Leaving at least 1/4 inch of space between cabinets and walls is recommended for expansion and contraction9.
- We should consider ordering 20% more cabinets than planned to account for any installation issues9.
How to Inspect Your New Cabinets
First, we need to check our new cabinets carefully. This step helps us make sure everything is right and there’s no damage. It’s important to avoid any delays in the installation process.
It’s key to know the difference between RTA and pre-assembled cabinets. RTA cabinets need to be put together, while pre-assembled ones are ready to go.
Checking for Completeness and Damage
We should get all parts needed for the cabinets. This makes sure we’re ready for installation day. Most kitchen cabinet projects are installed on time, 90% of them10.
But, 25% of the time, there might be cleanliness issues. This could mean the workmanship isn’t good10. We must check every piece for damage to avoid delays.
Understanding RTA Cabinets vs. Pre-assembled Cabinets
RTA cabinets are great for people who like to do things themselves. They take about 35-40 minutes to set up the first one and 15-20 minutes for the rest11. On the other hand, pre-assembled cabinets save us time because they’re already put together.
It’s important to make sure everything fits right. Cabinet doors and drawers should fit within 1/8” of perfect, which happens in 85% of cases10. Finding problems early helps us fix them quickly, making the installation smoother.
Measuring Your Space for Accurate Installation
Before we start our cabinet installation guide, we need to measure our kitchen space right. Getting the measurements just right helps us avoid any problems later on.
Finding the High Spot in the Floor
Finding the highest point in the floor is a key first step. This is more important in older homes where floors might not be even. Cabinets usually come in 3-inch increments for width and height. So, we need to make sure they fit perfectly.
It’s best to measure to the nearest 1/32” for a perfect fit12. We should measure different spots on the floor to catch any unevenness.
Marking the Locations for Base and Wall Cabinets
After finding the high spot, we mark where our base and wall cabinets will go. Base cabinets are usually 36 inches tall. Wall cabinets are 18 inches from the counter top to the bottom of the cabinet. This makes a total of 90 inches from the floor to the top of a 36-inch wall cabinet13.
Using a laser measuring tool can help us get more accurate than tape measures12. We should measure our walls at different heights. Also, remember to measure around windows and doors for a perfect fit14. With everything planned and marked right, we’re ready for a professional cabinet installation.
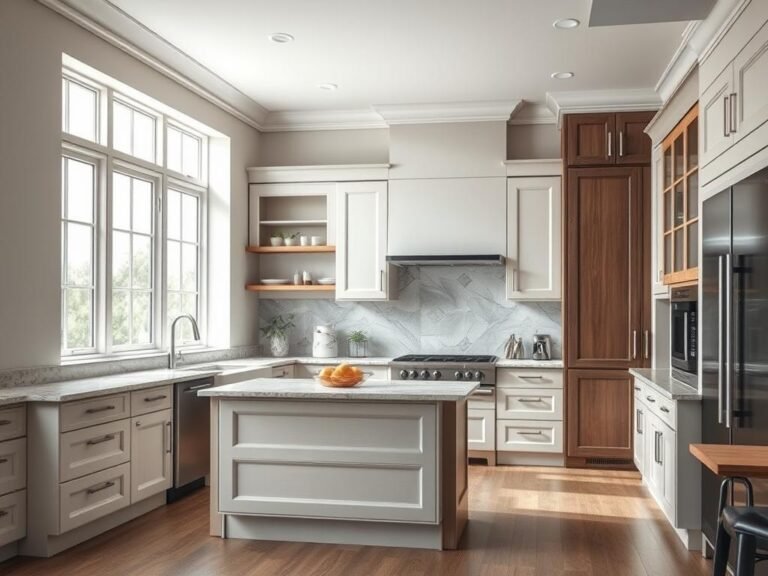
Understanding the Kitchen Cabinet Layout
Before we start our kitchen cabinet installation guide, it’s key to understand the kitchen layout. A good design can change how our kitchen works and looks. We should look at different kitchen layouts like G-Shaped, U-Shaped, L-Shaped, Galley, and Single Wall. Each layout has its own benefits that affect our cabinet installation.
Discussing Common Kitchen Layouts
The G-Shaped kitchen uses almost all the floor space, perfect for big kitchens15. U-Shaped kitchens can have more upper cabinets, which is great for storage15. L-Shaped kitchens are the most common because they’re affordable and efficient15. Galley kitchens are good for small homes and apartments because they save space15.
Creating a Plan for Your Cabinet Installation
When planning our cabinet installation, we need to think about where everything will go. We should consider big features like sink placements and appliance locations. In a typical kitchen, installing cabinets takes about 8 to 10 hours16.
Base cabinets should be 34 inches above the floor16. Upper cabinets should be 17 to 18 inches above them16. As we plan, we should also think about where outlets will go. They should be every 4 feet for easy access16. Using these tips will make our kitchen work better and look nicer.
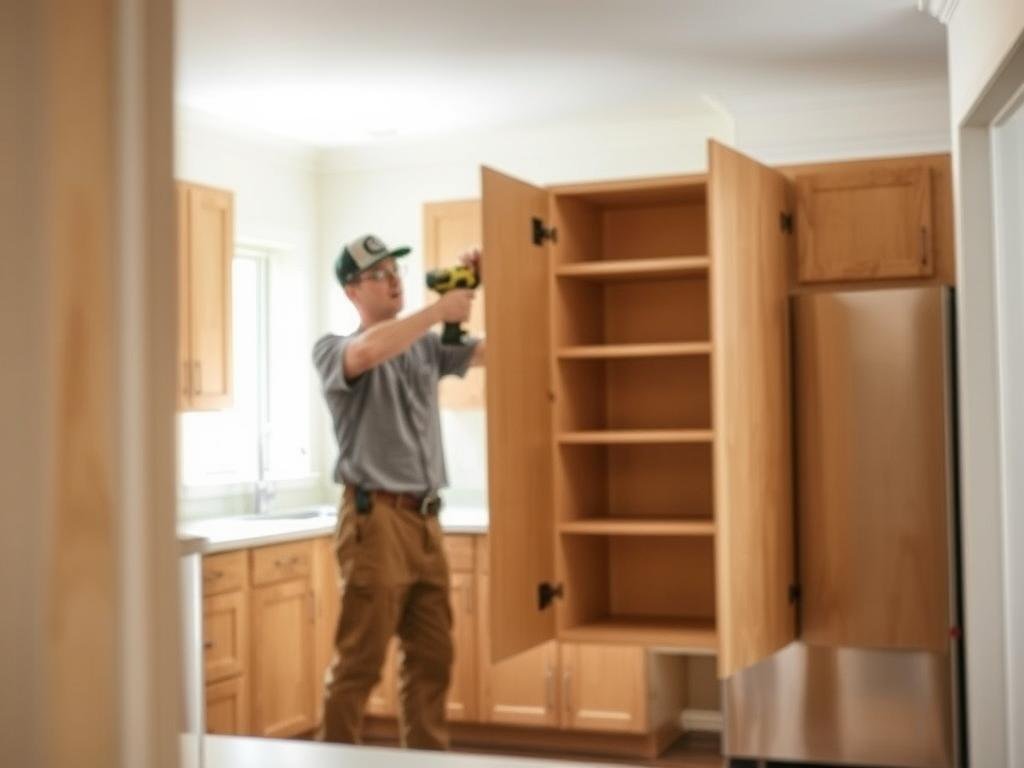
How to Install Kitchen Cabinets Step by Step
Installing kitchen cabinets needs a clear plan. We start with the corner cabinet, making sure it’s stable. A 2×4 for leveling is key; it should be 8 feet long for easy checking17.
Installing each cabinet takes about 35-40 minutes for the first one. The rest take 15-20 minutes each18.
Then, we attach each cabinet to the wall securely. Use 3-inch #10 screws and 3/16-inch pilot holes for a good fit18. Drive three pilot holes in each cabinet for stability18.
After securing wall cabinets, we move to base cabinets. Start with the corner unit. Use 2 ½-inch, #8 screws to attach them, with three pilot holes for stability18. Shimming is key for level mounting to the floor.
For the final steps, add a 4-inch toe kick for looks and cleaning19. Upper cabinets should be 18 inches above the countertop for space and alignment19. Having two people helps with the heavy work and positioning17.
Installing Upper Wall Cabinets First
Installing upper wall cabinets first helps us move freely while working overhead. A key tip is to place the bottom edge of the upper cabinets at 54 inches from the floor. This follows standard kitchen design2021. Start by measuring and marking the wall, making sure your measurements are accurate.
Use a stud finder to find the studs in your wall. They are usually 16 inches apart in homes20. For mounting, use 2 1/2-inch screws, two for each rail inside the cabinet20. Drill pilot holes over the studs for a tight fit.
If your cabinets don’t hit two studs, add screws into the stud for stability20. Using shims is key to keep cabinets level21. Check your work often and adjust as needed for a perfect fit.
Clamps help hold cabinets together for a smooth finish21. After installing, push on the cabinets to check their stability20.
Securing Cabinets to the Wall
Securing our kitchen cabinets to the wall is key for stability and lasting use. We must first figure out if we’re mounting them to wall studs or drywall. Cabinets should always be fixed to wall studs for safety. Using a stud finder makes finding them easy22.
The right height for wall cabinets is about 54 inches from the floor. We should also leave 17 to 18 inches above the base cabinets23.
Choosing the right screws is vital for a good install. For heavy loads, use 2½-inch deck screws. For smaller cabinets, 2-inch screws are better22. Always pre-drill and screw into the thicker framing piece at the top of the cabinets for a strong hold23.
After securing each cabinet, check if it’s plumb and level. This ensures they’re properly aligned. Sometimes, we need to use shimming to adjust the cabinets on lower spots for level23.
When installing, use at least 4 screws to connect cabinets: two on the top and two on the bottom. It’s easier to lift and install two cabinets at once on the ledger board for efficiency23. Having at least two helpers makes the job easier, allowing us to focus on precise adjustments24.
Finishing Touches After Cabinet Installation
The finishing touches after cabinet installation are key to a polished kitchen. We make sure everything fits right and looks good. Adjusting doors and drawers makes them easy to use and looks seamless.
Adjusting Doors and Drawers for Alignment
After installing cabinets, checking door and drawer alignment is critical. We need to make sure doors close smoothly without gaps. This creates a unified look.
Using a level ensures accurate adjustments. Most kitchen cabinets are 30 to 36 inches tall for better function25. For installation, use 2 ½-inch screws to the wall, with pre-drilled holes for stability25.
Installing Crown Molding and Toe Kicks
Installing crown molding and toe kicks boosts the kitchen’s look. Crown molding adds a decorative touch. Toe kicks cover gaps at the bottom of cabinets, giving a finished look.
These details need to fit well for a uniform look. They may take extra planning time, depending on wall and cabinet settings26.
Common Cabinet Installation Tips and Techniques
Starting our cabinet installation journey can be easier with some tips. First, check for wall bowing, over 3/8 inches, for shimming27. Use tools like predrilling holes for screws to build a strong cabinet27. GRK’s R4 screws are great for a solid fit27.
Hanging upper cabinets first helps avoid awkward placement27. Island or peninsula cabinets need floor screws for stability27. Raising cabinets for hardwood or tile floors is smart27.
Mark cabinet heights with level lines for alignment27. Remove doors and drawers to avoid damage27. DIY saves money, but pros cost $50 to $450 per foot28.
Base cabinets are about 34-1/2 inches tall, with countertops adding more28. Prepare walls by removing old cabinets. A laser level helps find uneven spots for accurate installation28.
Conclusion
Our journey to install kitchen cabinets was tough but rewarding. We learned key steps like getting tools and measuring our space. This kitchen cabinet installation tutorial showed how important preparation is. Around 70% of homeowners see kitchen updates as a way to boost their home’s value29.
Doing it ourselves saved us money and let us make our kitchen our own. About 90% of DIYers feel proud of their work, seeing the big change30. We started with upper cabinets, a smart move that made things easier29.
Now, our kitchen looks great and is more useful. With the right steps and tips, we made a space that shows off our style. We also improved storage by up to 30%30. Feeling proud of our kitchen makeover is amazing.
FAQ
What tools do we need for installing kitchen cabinets?
You’ll need drills, levels, screwdrivers, and measuring tapes. Also, cabinet hinges and mounting screws are key. A good toolbox makes the job easier.
How do we prepare the area for cabinet installation?
First, clear the space and remove old cabinets. Then, fix walls and paint if needed. A clean area helps avoid problems.
What should we check when inspecting new cabinets?
Look for damage and make sure everything is there. RTA and pre-assembled cabinets need special care to avoid delays.
How do we measure accurately for our cabinets?
Find the highest spot on the floor. Then, mark spots for base and wall cabinets. This ensures a perfect fit with your kitchen.
Is there a specific order to install cabinets?
Yes, start with upper cabinets. This makes it easier to work without getting in the way.
What are some common challenges we may face during installation?
Uneven walls and alignment issues are common. Having a plan for these problems is key.
Can we add new flooring before cabinet installation?
Adding flooring first is a good idea. Just make sure it won’t mess up cabinet fitting. Flooring works best after cabinets are in place.
What finishing touches should we include after installing cabinets?
Adjust doors and drawers for a perfect fit. Add crown molding and toe kicks for a polished look.